Home Automation
Using ESPHome Without the Home Assistant Addon
The "blessed" flow for using ESPHome is the Home Assistant ESPHome Addon. This works well! It has a nice editor and it takes care of some housekeeping tasks for you. If you don't already have a comfortable development workflow it's a very nice way to start.
If you do already have a working style that doesn't involve a web UI and a browser editor you can still use ESPHome, you just have to handle those housekeeping tasks yourself.
Fundamentals
I think it can be helpful to step back and take a look at the fundamentals of a piece of software like ESPHome before diving headlong into the deep pool of non-standard workflows.
At it's base level ESPHome is a microcontroller firmware generator. That is, it reads your YAML config, generates a bunch of C++ files and config files, and then using a compiler and some helper programs it generates a binary program that your microcontroller (usually but not always an ESP32) can run.
ESPHome also has a few very useful helpers. First, it can do seamless over the air (OTA) updates once any ESPHome firmware has been installed on a device.
Second, it has a pretty powerful web-based UI and configuration editor.
Third, ESPHome ships with a "native" binary protocol it can use to talk to Home Assistant (previously) complete with Noise-based symmetric key encryption.
Lastly, it can be used as a Home Assistant addon, which as I said earlier takes care of a few things for you. The OTA update functionality requires a pre-shared key to validate that updates are coming from a known source. The addon takes care of generating that and the Noise secret and sharing these keys with Home Assistant so you don't have to care about them.
ESPHome on a Macbook?!
My ESPHome workflow doesn't involve the web UI or the addon at all.
Instead, I install ESPHome on my Macbook with homebrew and manage the OTA and HA secret keys with 1Password and a small helper script.
The script and all of my ESPHome configs live in this public GitHub repo.
This is the script as it exists today:
#!/bin/bash

set -x
set -eo pipefail

trap "rm common/device_base.yaml" EXIT

op inject --in-file common/device_base.yaml.in --out-file common/device_base.yaml

command=$1
shift

if [ $# -eq 0 ]; then
    configs="*.yaml"
else
    configs="$@"
fi

esphome $command $configs
All this is really doing is using 1Password's op inject tool to generate a file with my configured secrets, runs esphome, and makes sure to clean up the generated file with that trap line.
The top of device_base.yaml.in looks like this:
substitutions:
  wifi_ssid: "op://keen.land secrets/ESPHome Secrets/ESPHOME_WIFI_SSID"
  wifi_password: "op://keen.land secrets/ESPHome Secrets/ESPHOME_WIFI_PASSWORD"
  fallback_ssid_password: "op://keen.land secrets/ESPHome Secrets/ESPHOME_FALLBACK_SSID_PASSWORD"
  home_assistant_encryption_key: "op://keen.land secrets/ESPHome Secrets/ESPHOME_HOME_ASSISTANT_ENCRYPTION_KEY"
  ota_password: "op://keen.land secrets/ESPHome Secrets/ESPHOME_OTA_PASSWORD"
All of those are just text entries in the ESPHome Secrets rich text item, but again they can be whatever you want.
If you decide to make them password type entries I believe you'd need to add --reveal to the op inject command, but I'm not 100% certain on that.
This differs in kind of a fundamental way from the way the web UI / addon work, in so far as the addon will create and manage unique OTA and HA keys for each device. My setup instead uses two keys shared among all of my devices. I don't see this as a significant risk because I don't use esphome devices in higher security contexts (i.e. my door locks are not running esphome), but your threat model is likely different than mine so you should make your own decisions. Nothing is stopping you from using unique keys for every device with this setup, you just have more secrets to manage in 1Password.
Workflow
My workflow looks like:
$ <edit whatever.yaml>
$ ./build.sh run whatever.yaml
# a bunch of compiler output and then logging from the device itself
$ git add whatever.yaml && git commit -m 'updates' && git push origin main
There aren't many hard edges with this setup.
You can put whatever you want into common and you can organize your devices however you want.
One exception is that secrets.yaml has some confusing implicit behavior, so I just commit an empty one and use a different file for my secrets.
Updating ESPHome is not something I do on a regular basis, but when I do it's basically just brew upgrade esphome && ./build.sh.
The process to add a new ESPHome device to Home Assistant is also fairly streamlined.
All you do is attach the ESP32 device to your computer with USB, create a new yaml file, and run ./build.sh run <your new file>.yaml.
ESPHome will pick up that there's a serially attached device without firmware and handle flashing the new firmware to it.
Once ESPHome is running on the new device it should show up in the Home Assistant integrations page and something that can be added. Clicking the accept button will open a config flow where you can paste your Home Assistant key, and then it should work just like any other device.
ESPHome Server in Python
Last year I installed holiday lights on my house (previously). At the time I chose a controller that had the following key qualities: a) cheap, b) worked with WLED, c) cheap.
After using it for a season I discovered that the reason why this controller is so cheap is because it uses an ESP8266, which is fine, but it doesn't play well with my setup. For example, if I enable the Home Assistant integration the controller falls over after a few hours. It also reboots for unknowable reasons sometimes and I would come home to find the lights in their default orange color.
I probably could have fixed this with a more powerful controller. I even bought a neat ESP32 controller with a built-in wide range voltage regulator but never got around to setting it up.
Loosely, what I want is:
- Control the lights without random reboots
- Easy Home Assistant integration
- Easy customization
- No Wi-Fi
- Use hardware that I already have
- Tailscale, ideally
- Learn some stuff
I could have gotten the first two using a more powerful ESP32 module. Third could be done with ESPHome. Four and five are contradictory while staying within the constraint of an ESP32-based system.
Also last year, I built a little box that controls the power for my 3D printer with a Raspberry Pi Pico and a second Klipper instance (previously) so naturally I tried to get Klipper to fit in this non-3d-printer shaped hole. I tried so hard.
On the surface, Klipper appears to do everything that I want (control addressable LEDs, kind of customizable) but it makes no compromises in wanting to be a 3D printer controller.
Most of the firmware is dedicated to running a motion controller, there's a lot of emphasis on scheduling things to happen in the near future, and there's a global printer object.
Importantly for my purposes, there's no built-in way to set up a digital input without declaring it a button.
It's fine. Klipper is fine. It's just not built to be a generic IO platform.
So, what's a reasonable rational person to do?
Write an ESPHome Protocol Server
Of course.
There are essentially three ways to get arbitrary devices and entities to show up automatically in Home Assistant.
First, one can write a Home Assistant integration. This is fine and good but it doesn't work for me because my devices are far away from the VM that Home Assistant runs in.
Second, there's MQTT autodiscovery. I know this works because it's how my Zigbee devices integrate with HA, but I just could not make any of the existing generic autodiscovery libraries work consistently. Usually I would end up with a bunch of duplicate MQTT devices and then HA would get confused.
Third, there's ESPHome. ESPHome is a firmware for ESP modules (think: small devices with wifi like plugs, air quality monitors, etc). ESPHome belongs to the Open Home Foundation, same as Home Assistant, so it has commercial support and a first class HA integration. I already have a bunch of ESPHome devices running in my house, so it seems like a pretty natural fit.
The normal and ordinary way of using ESPHome is to write some YAML config that ESPHome compiles into a firmware for your device, then you flash the device and HA sets itself up to interact with the entities you described in YAML. What I want to do is just that last bit, the part where I can tell HA what entities I have and it sets up UI for me.
HA talks to ESPHome over what they call their "native API". The native API is a TCP-based streaming protocol where the ESPHome device is the server and Home Assistant is the client. They exchange protocol buffer encoded messages over either plain TCP or with a Noise-based encryption scheme.
Over the last week or so I built a Python implementation of that protocol named aioesphomeserver, bootstrapping off of the official aioesphomeapi client library that HA uses.
A Minimal Example
Here's a very simple example of what aioesphomeserver looks like:
import asyncio

from aioesphomeserver import (
    Device,
    SwitchEntity,
    BinarySensorEntity,
    EntityListener,
)

class SwitchListener(EntityListener):
    async def handle(self, key, message):
        sensor = self.device.get_entity("test_binary_sensor")
        if sensor != None:
            await sensor.set_state(message.state)

device = Device(
    name = "Test Device",
    mac_address = "AC:BC:32:89:0E:C9",
)

device.add_entity(
    BinarySensorEntity(
        name = "Test Binary Sensor",
    )
)

device.add_entity(
    SwitchEntity(
        name = "Test Switch",
    )
)

device.add_entity(
    SwitchListener(
        name="_listener",
        entity_id="test_switch"
    )
)

asyncio.run(device.run())
From the top, we import a bunch of stuff and then create a class that listens for messages from the device (the handle method).
Then, we set up a device with a name and a fake MAC address. Device can generate a random one for you but it doesn't persist, so if you want this device to stick around in HA you should declare a static MAC.
We then add some entities to it: a binary sensor, a switch, and an instance of our switch listener configured for Test Switch.
Finally, we start the asyncio event loop.
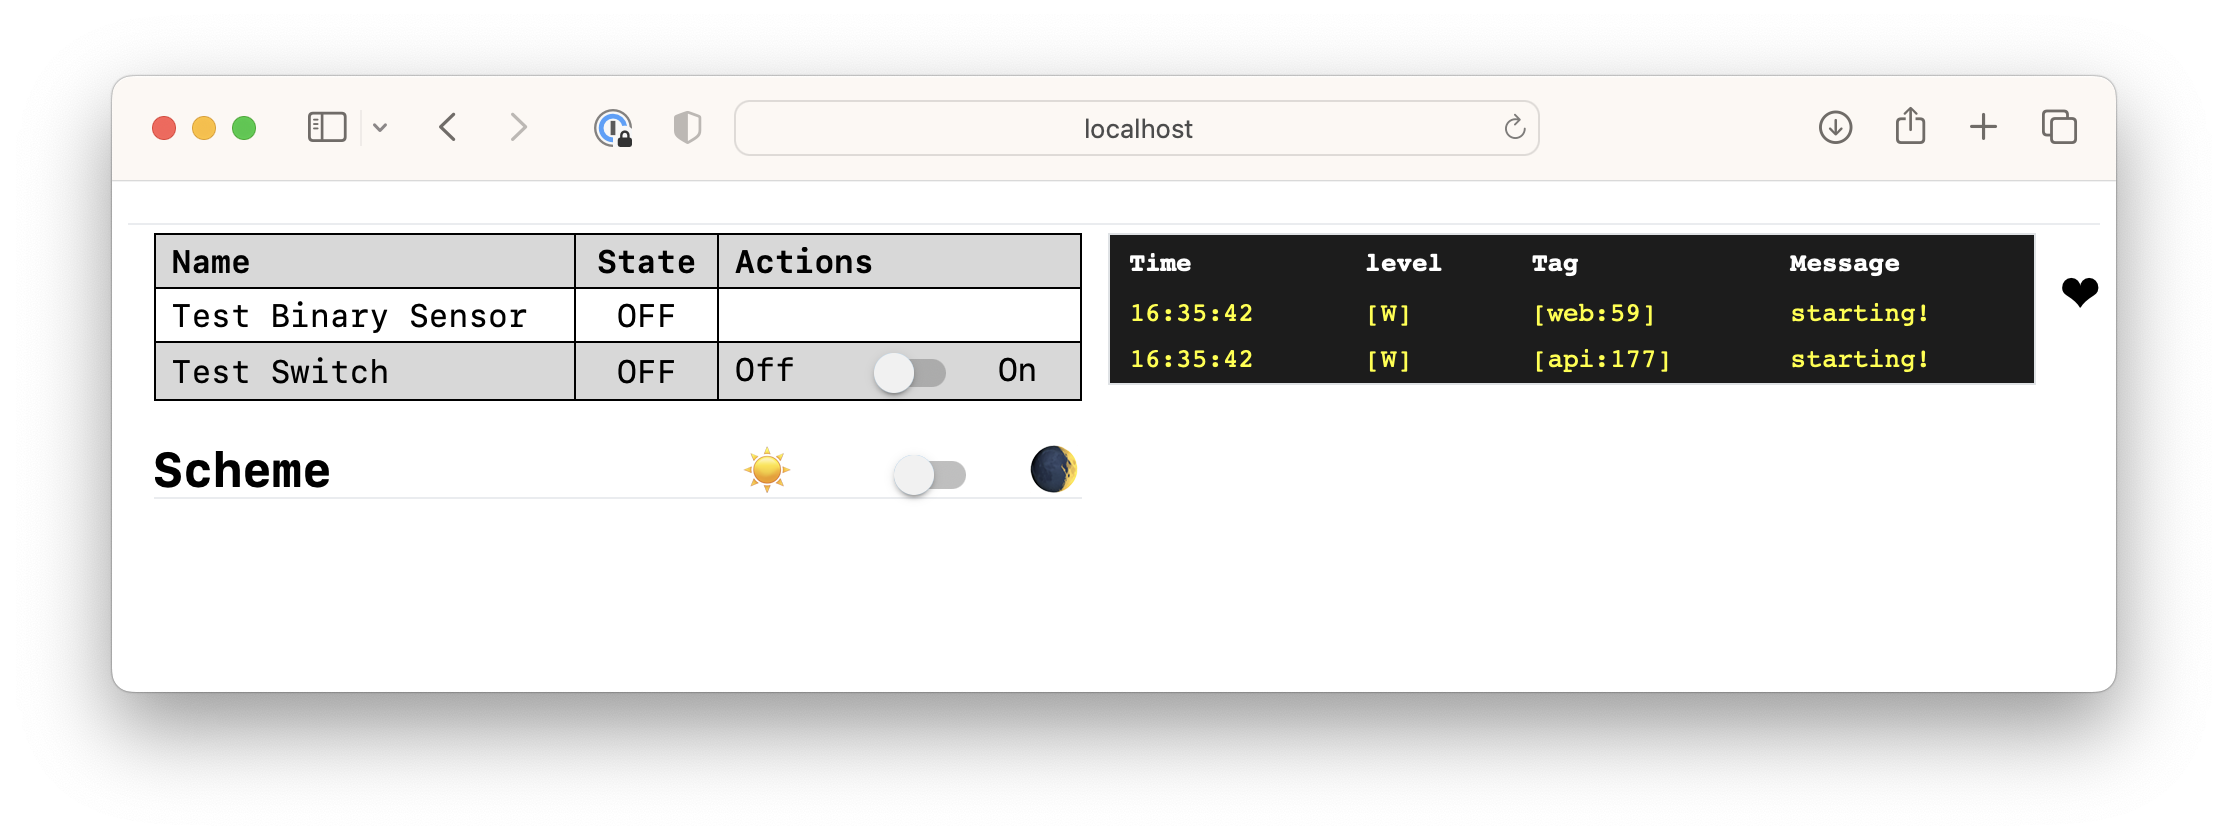
With just that, you get the ESPHome web UI:

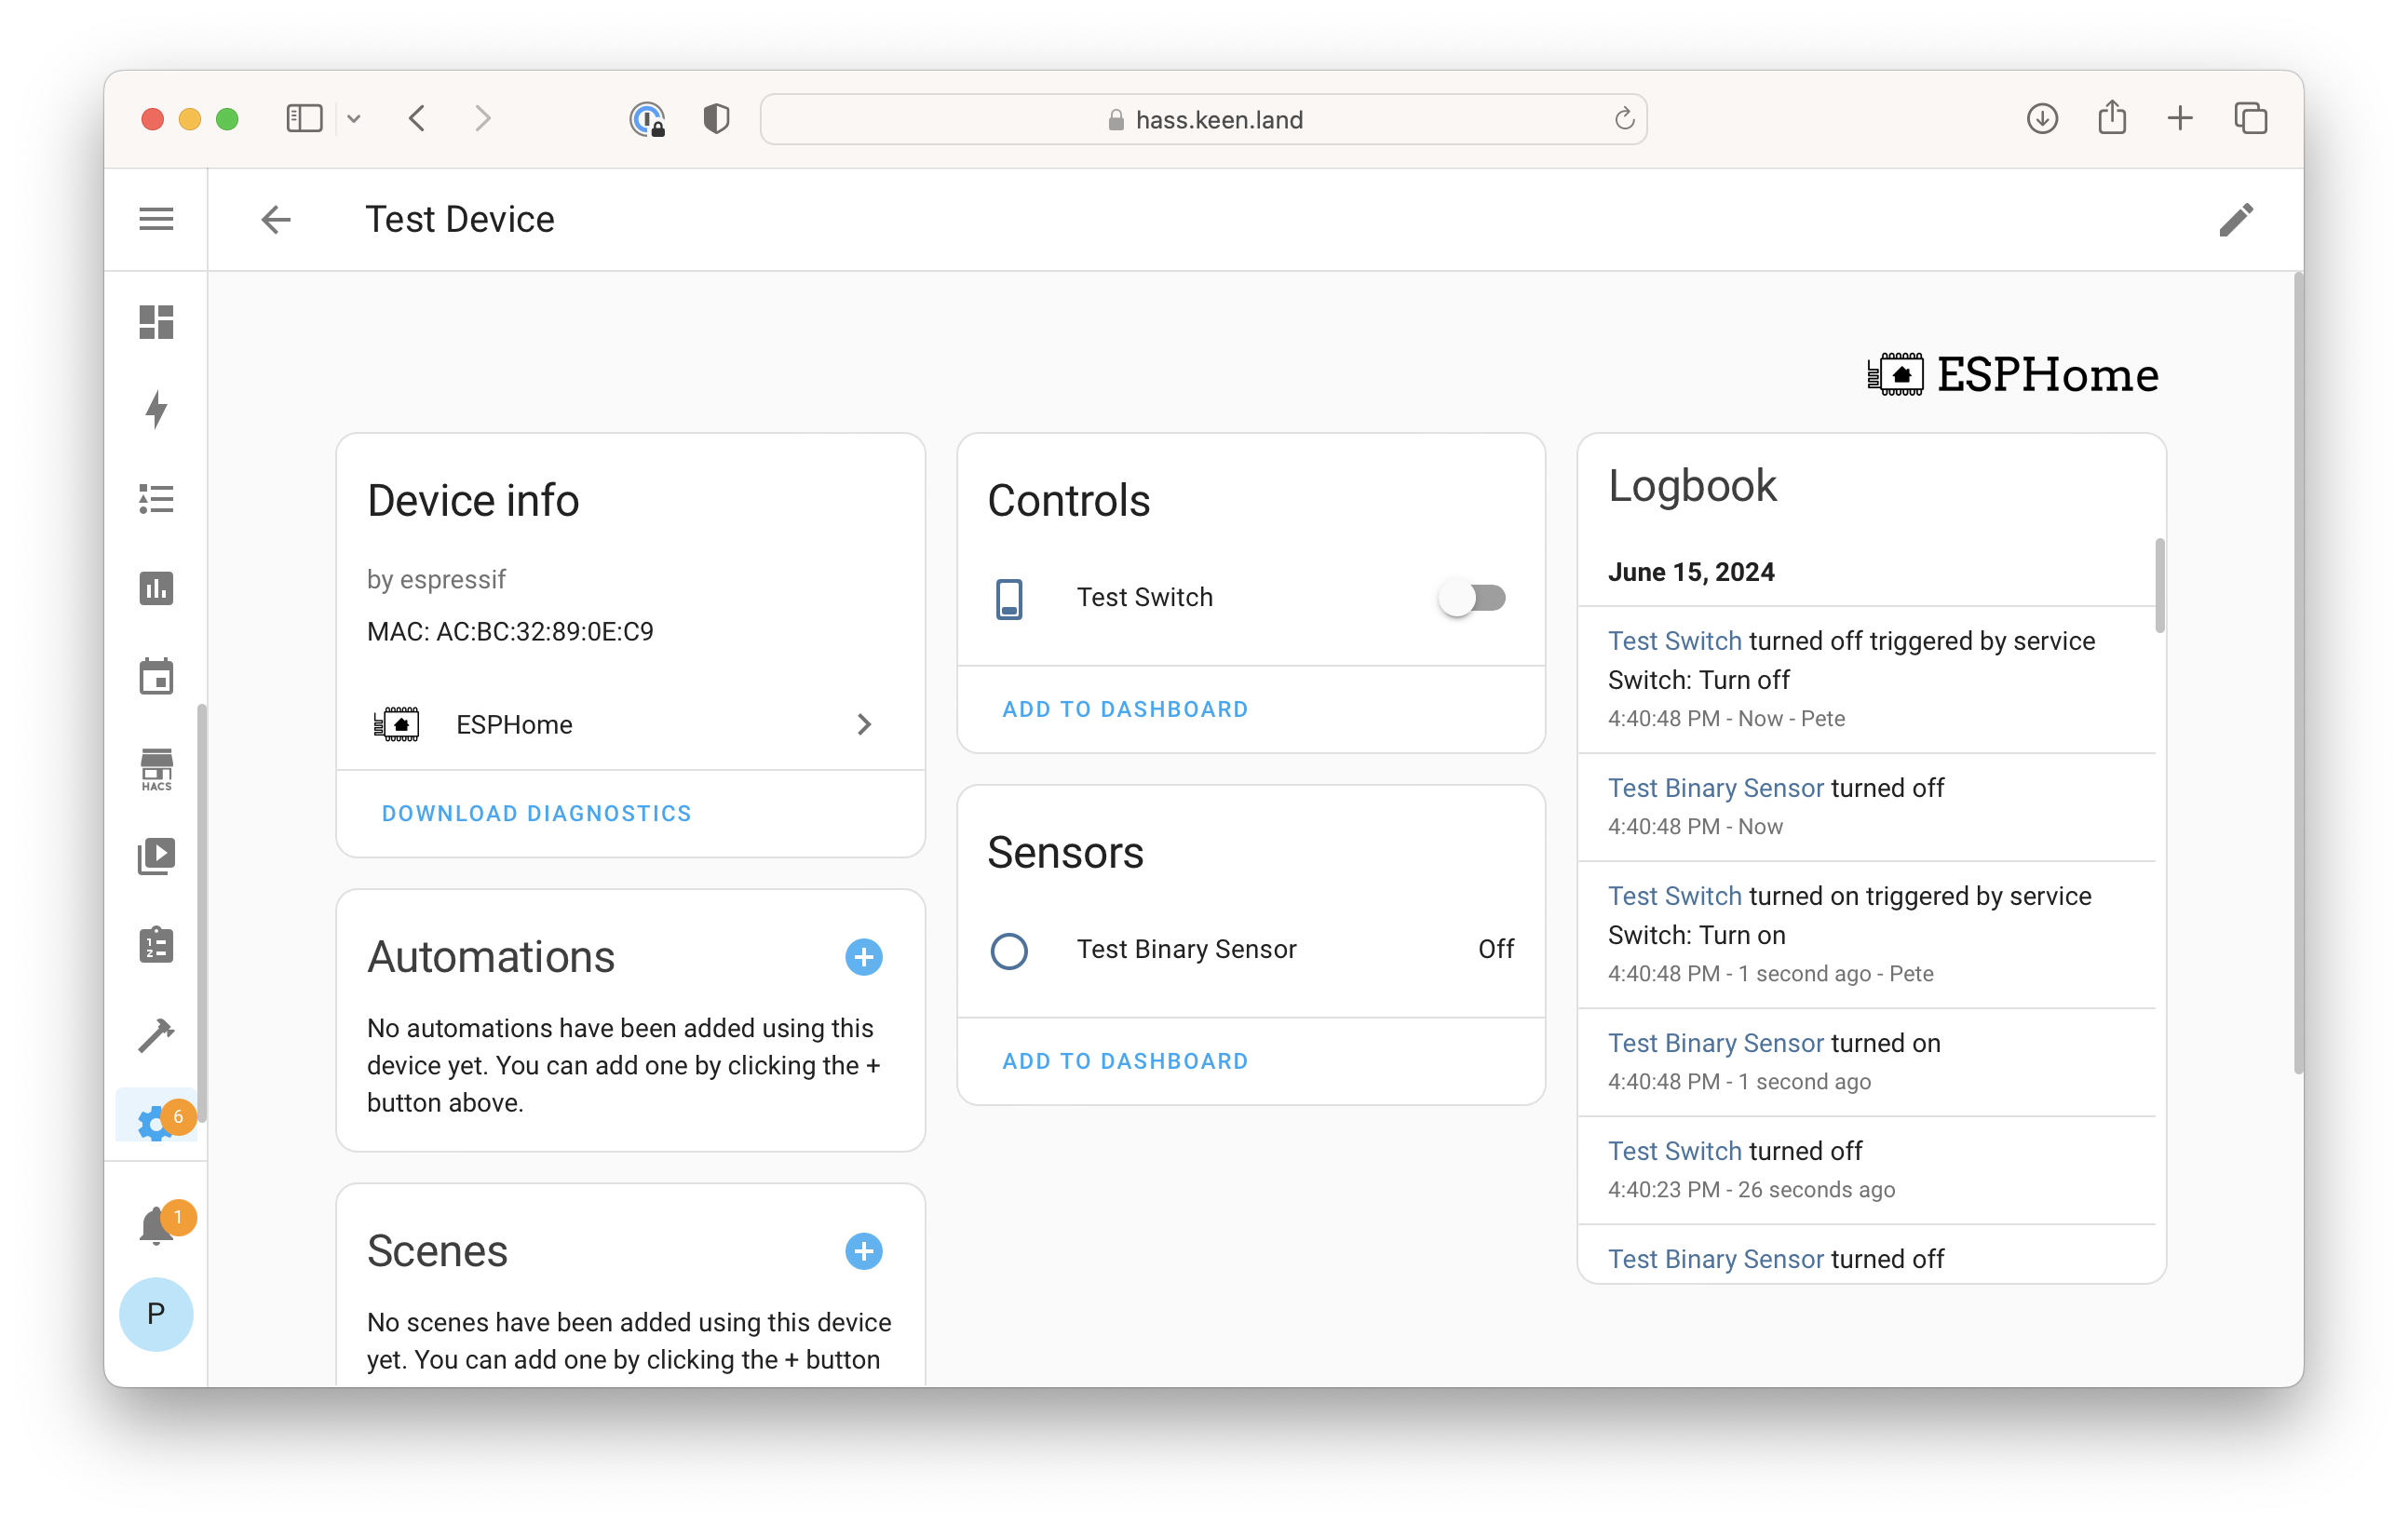
Adding the device to Home Assistant you'll see this:

AIO ESPHome Server Architecture
I tried to follow the spirit of ESPHome's architecture when writing the server.

The Device is a central registrar for Entitys and serves as a message hub.
The native API server and web server are entities that plug into the message bus, as are things like SwitchEntity and BinarySensorEntity.
Everything is async using Python's asyncio.
Any entity with a run method will automatically be scheduled as a task at startup.
A Production Example
The development case for this library has been driving the addressable LEDs on my house. I found a project named u2if that turns a Raspberry Pi Pico into a USB peripheral that provides a bunch of fun stuff: GPIO, I2C, SPI, PWM, ADC as well as an addressable LED driver for WS2812-compatible lights. The fun wrinkle of the light driver is that it offloads the bitstream generation to the Pico's PIO coprocessors.
I forked u2if and added a few things:
- RGBW support, which was already in the codebase but not available
- Support for the Pico clone boards I have (SparkFun Pro Micro RP2040)
- A set of effects for Neopixel along with a console-mode simulator to use while developing
- A Docker image that bundles the firmware and the Python library
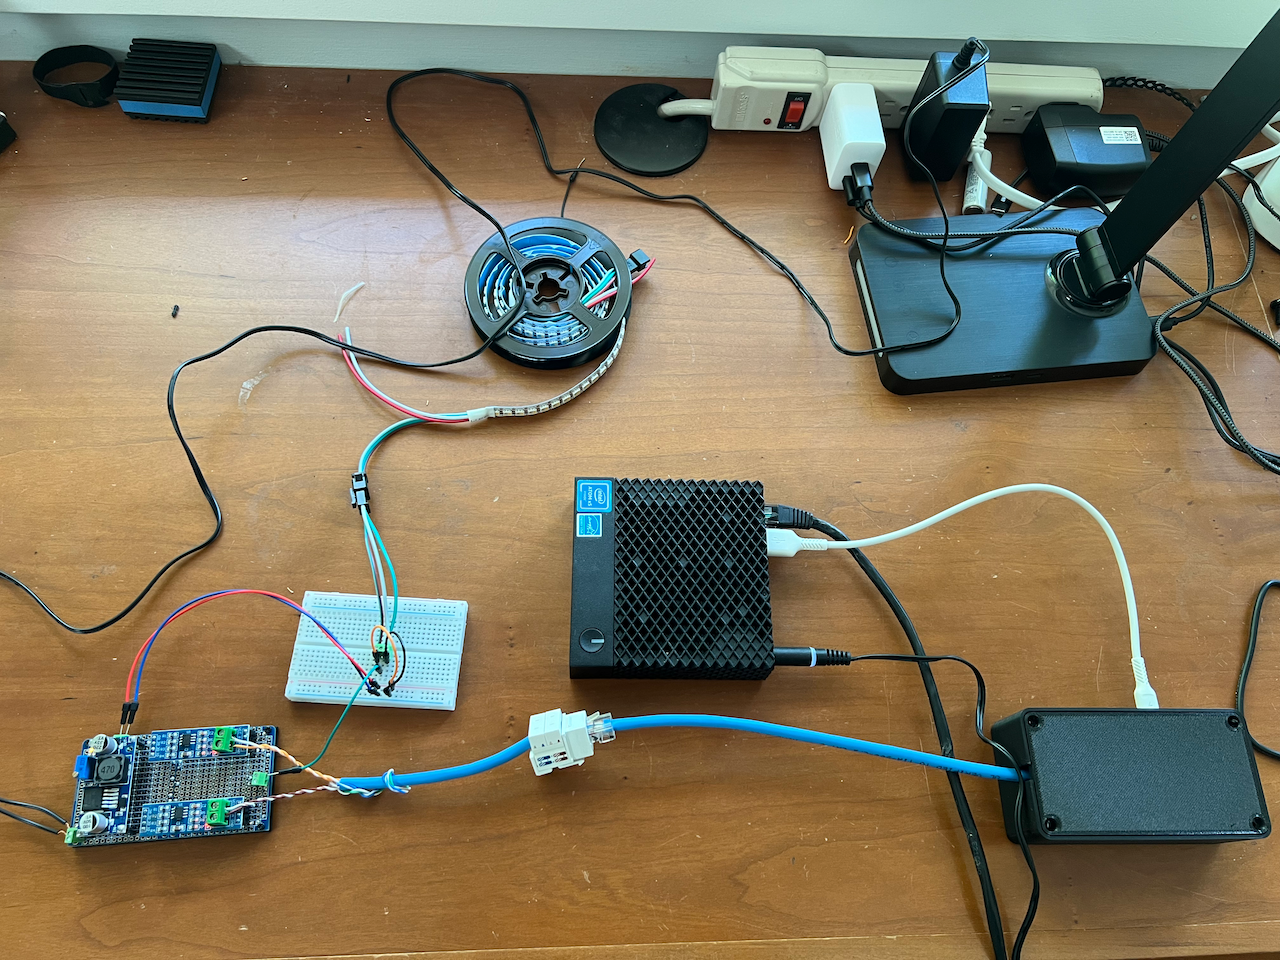
This deployment consists of:
- A Dell Wyse 3040 thin client running Alpine Linux that already handles Z-Wave for the garage
- SparkFun Pro Micro RP2040 running the u2if firmware connected over USB
- Two channels of RS485 transceivers so I can get the very fast, very unforgiving light control signals 40 feet from where the 3040 is mounted to the wall to where the light power injector lives.

Here is the full script that I'm using to drive the addressable lights on my house:
import asyncio

from machine import WS2812B
from neopixel.effects import StaticEffect, BlendEffect, TwinkleEffect

from aioesphomeserver import (
    Device,
    LightEntity,
    LightStateResponse,
    EntityListener,
)

from aioesphomeapi import LightColorCapability

class LightStrip(EntityListener):
    def __init__(self, *args, strings=[], effects={}, **kwargs):
        super().__init__(*args, **kwargs)
        self.strings = strings
        self.num_pixels = sum([s[1] for s in strings])
        self.effects = effects

        self.current_effect_name = None
        self.current_effect = StaticEffect(count=self.num_pixels)
        self.white_brightness = 0.0
        self.color_brightness = 0.0

    async def handle(self, key, message):
        if type(message) != LightStateResponse:
            return

        await self.device.log(1, f"message.effect: '{message.effect}'")

        if message.effect != "" and message.effect != self.current_effect_name:
            if message.effect in self.effects:
                self.current_effect_name = message.effect
                self.current_effect = self.effects[message.effect](self.num_pixels, message)
                self.current_effect.next_frame()

        if self.current_effect:
            self.current_effect.update(message)

        self.color_brightness = message.color_brightness
        self.white_brightness = message.brightness

        if message.state == False:
            self.color_brightness = 0.0
            self.white_brightness = 0.0

    def render(self):
        pixels = []

        for i in range(self.num_pixels):
            color = self.current_effect.pixels[i]

            pixel = [
                int(color[0] * 255.0 * self.color_brightness),
                int(color[1] * 255.0 * self.color_brightness),
                int(color[2] * 255.0 * self.color_brightness),
                int(color[3] * 255.0 * self.white_brightness),
            ]

            pixels.append(pixel)

        # partition strings
        # write to each string
        cur = 0
        for string, length in self.strings:
            last = cur + length - 1
            string.write(pixels[cur:last])
            cur = last + 1

    async def run(self):
        while True:
            self.current_effect.next_frame()
            self.render()
            await asyncio.sleep(1/24.0)


device = Device(
    name = "Garage Stuff",
    mac_address = "7E:85:BA:7E:38:07",
    model = "Garage Stuff"
)

device.add_entity(LightEntity(
    name="Front Lights",
    color_modes=[LightColorCapability.ON_OFF | LightColorCapability.BRIGHTNESS | LightColorCapability.RGB | LightColorCapability.WHITE],
    effects=["Static", "Twinkle"],
))

def make_twinkle_effect(count, state):
    return BlendEffect(
        TwinkleEffect(count=count, include_white_channel=True),
        StaticEffect(count=count, color=[state.red, state.green, state.blue, state.white], include_white_channel=True),
        mode='lighten',
        include_white_channel=True,
    )

device.add_entity(LightStrip(
    name = "_front_lights_strip",
    entity_id = "front_lights",
    strings = [(WS2812B(23, rgbw = True, color_order="GRBW"), 20)],
    effects={
        "Static": lambda count, state: StaticEffect(count=count, color=[state.red, state.green, state.blue, state.white], include_white_channel=True),
        "Twinkle": make_twinkle_effect,
    },
))

asyncio.run(device.run())
The structure is basically the same as the minimal example.
We import some stuff, we set up an EntityListener class, and then we set up a Device with a LightEntity and an instance of the listener .
In this case, the listener listens for state responses from a Light entity and renders pixels according to a set of effects.
It also has a run method that renders the current effect out every 1/24th of a second.
Should you use this?
I don't know!
If your constraints match mine, maybe it'd be helpful. If you want to expose a thing to Home Assistant and would rather have it show up as an ESPHome device rather than, say, writing your own HA integration or messing with MQTT or writing RESTful API handlers, this would probably be useful.
That said, I think if your use case fits within ESPHome proper you should use that. ESPHome has built in drivers for so many things and is going to be better supported (i.e. people are paid to work on it).
Pretty neat though, eh?
The Simply Complicated Automatic Sprinkler
I've never owned a sprinkler before. I've just never had a need for one.
Until this past Monday, when I installed some grass seed and couldn't promise myself that I'd water it twice a day every day for the next month as one is supposed to do.
A normal person would just buy a mechanical or stand-alone timer device and be done with it. Not me. No way.
My first thought (a completely normal one, mind you) was to grab an esp32 and a relay board out of my parts bin and liberally apply ESPHome to the problem. This didn't happen because I recently cleaned my office and put those parts in a bin that I can't quite find right now.
cough. Anyway.
My fallback plan was to grab a Z-Wave relay that was more readily at hand and just ("just") use Home Assistant as the timer.
Using a Static JSON File in Home Assistant
Recently I found myself needing to bring some JSON from a file into a Home Assistant sensor. Specifically, the electricity rates for my power company are woefully out of date on OpenEI so I decided I could just maintain the data myself.
Home Assistant doesn't have a direct way to read JSON data from a file into a sensor. There's the File platform which has a promising name but is actually a trap. File is meant for use cases where something writes to, say, a CSV file continuously and you just want to read the most recent line. It specifically does not read the whole file.
After a lot of searching I came across the Command Line platform. The integration does a number of things, but for our purposes it lets you periodically run a command within the context of the Home Assistant container and bring the output back into Home Assistant as a sensor.
Using Eufy Permanent Outdoor Lights with WLED
For as long as I've known her, my wife has been very into decorating for the holidays. She loves it. The traditions, the cherished ornaments, the stockings on the wall, etc etc.
I'm ok with decorating. It's fine. It's not my favorite thing.
The one thing I don't like at all, though, is putting up outdoor lights. Getting up on the roof at our previous house was a complete nightmare that I absolutely refused to do, so we just strung some lights around the porch and called it good.
After moving into our current house I had the idea that I would install "permanent" outdoor lights, but then I was worried that I would need to take them down when we got the roof and gutter replaced at some point so I kept deferring.
This year, though, an internet friend mentioned Eufy Permanent Outdoor Lights.